How to Optimise PC Airflow for Cooler Gaming
Learn how to optimise PC airflow with practical fan placement, cable routing and cooling checks for a quieter, more reliable gaming PC at home.
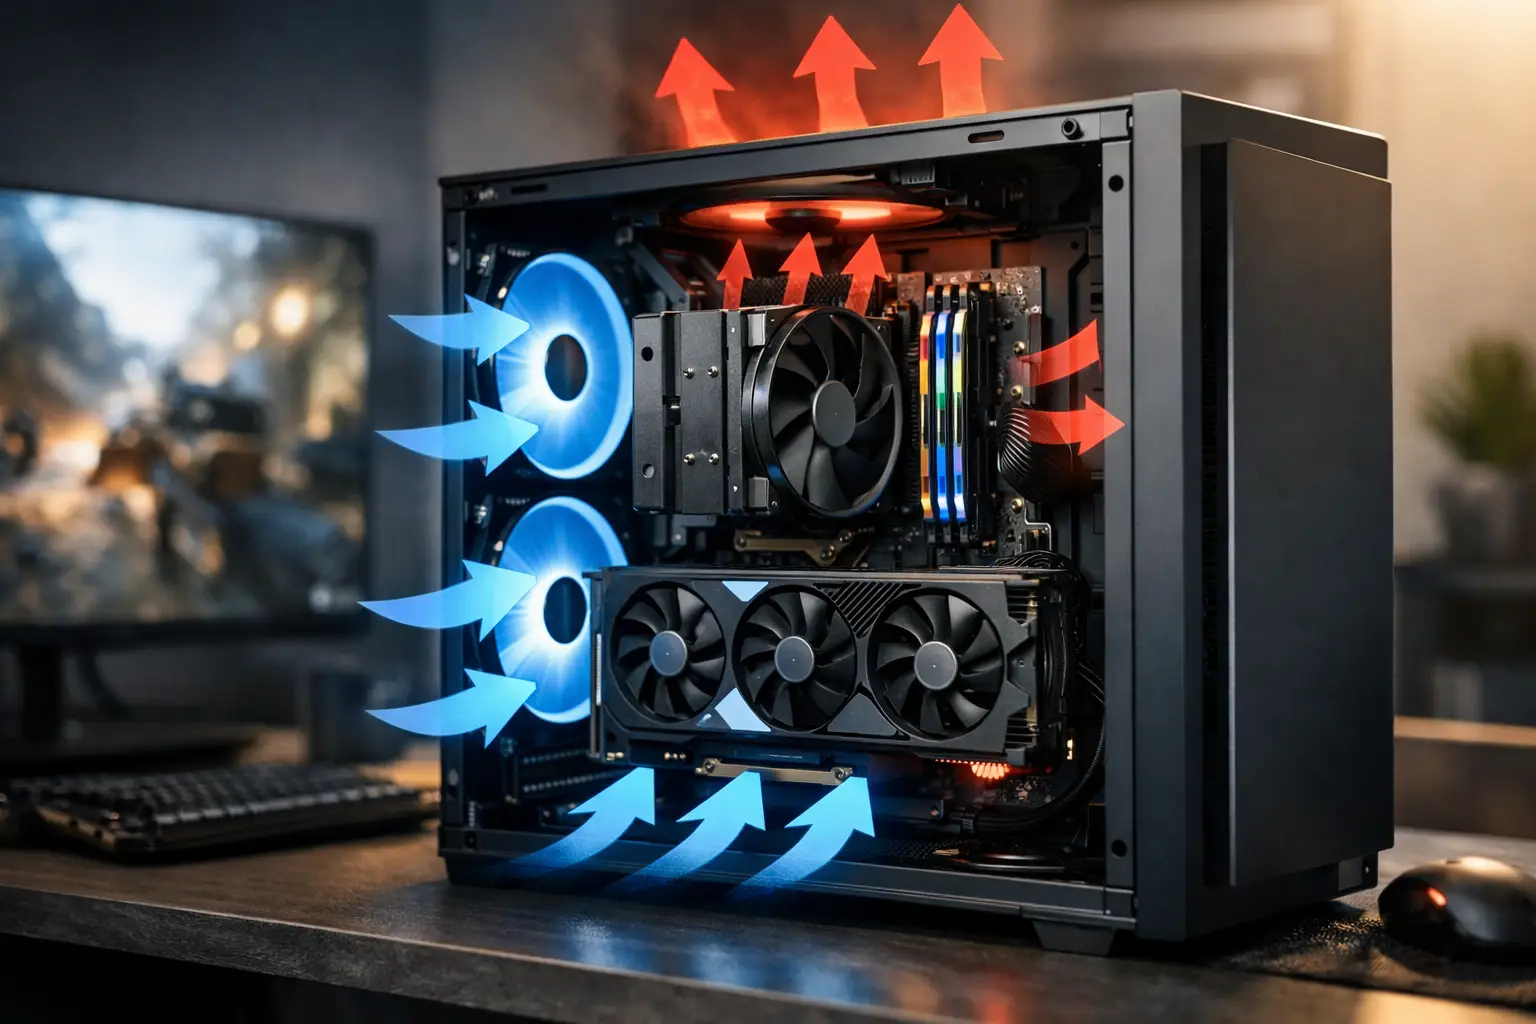
A powerful graphics card and processor can only sustain their best performance if the heat they produce has somewhere to go. Knowing how to optimise PC airflow helps your system stay cooler during long gaming sessions, reduces unnecessary fan noise and supports the long-term reliability of premium components.
The goal is not simply to fit more fans. Effective cooling is about creating a controlled path for cool air to enter the case, pass across heat-generating hardware and leave without circulating back through the system. The best setup depends on your case, component choice, room temperature and whether visual design matters as much as raw thermal performance.
Start with a clear airflow path
Most gaming PCs work best when cool air enters through the front and bottom of the case, then warm air exits through the rear and top. This follows the natural tendency for warm air to rise while giving the graphics card and CPU cooler a steady supply of fresh air.
Before changing fan positions, look inside your case and trace this route. Front intake fans should have a reasonably open path towards the graphics card. The CPU cooler or radiator should receive air that has not already been heated significantly by the GPU. Rear and top exhaust fans should be able to remove warm air without obstruction.
A case can have six or more fans and still cool poorly if they work against one another. For example, placing every fan as an intake can leave heat trapped inside. Equally, excessive exhaust can pull dust into every unfiltered gap in the chassis. A balanced layout is more valuable than a high fan count.
Choose the right fan direction
Case fans normally pull air in through the open side and push it out through the side with the support struts and motor hub. Check the small arrows moulded into the fan frame if you are unsure. Testing direction before fitting a fan saves time and avoids a layout that looks tidy but performs badly.
For most mid-tower gaming systems, two or three front intake fans, one rear exhaust fan and one or two top exhaust fans provide an effective foundation. This is a starting point rather than a fixed rule. A compact case may benefit from fewer fans to prevent turbulence, while a large case housing a high-wattage graphics card may need additional bottom intake.
Top-mounted fans deserve particular care. In many builds, top exhaust works well because it removes rising heat from the CPU area. However, a top-front exhaust fan can sometimes remove cool air before it reaches an air cooler or graphics card. If temperatures are already satisfactory, there is no need to add fans simply to fill every mounting position.
Positive pressure versus negative pressure
Positive pressure means your intake fans move slightly more air into the case than exhaust fans remove. The excess air escapes through small openings, making it harder for unfiltered dust to be drawn in. For a PC used in a typical home environment, this is often the most practical approach.
Negative pressure occurs when exhaust airflow is greater than intake airflow. It can remove heat effectively in some layouts, but it also tends to draw dust through unfiltered vents, expansion slots and panel gaps. That means more frequent cleaning and, over time, reduced cooling performance.
You do not need laboratory-grade measurements to get close. Use more intake fan capacity than exhaust capacity, keep intake filters clean and check whether dust is collecting around unfiltered openings. Fan size, speed and radiator resistance all affect the real result, so two intake fans do not automatically equal two exhaust fans.
Position CPU cooling with the rest of the case in mind
A tower-style air cooler should usually face from front to rear. Its fan draws cooler air from the front intake area, pushes it through the heatsink and hands that warm air directly to the rear exhaust fan. Turning it towards the top is possible in certain cases, but only where it creates a similarly clear route.
With an all-in-one liquid cooler, radiator placement involves a trade-off. A front-mounted radiator used as intake supplies the CPU with the coolest available air, which can improve processor temperatures. The downside is that the warmed air then enters the case and may increase graphics card temperatures.
A top-mounted radiator used as exhaust removes CPU heat directly from the case and often benefits GPU airflow. In return, the radiator is cooled by air that is already warmer inside the case. Neither choice is automatically superior. For a gaming-led system with a powerful GPU, top exhaust is commonly a strong all-round option. For CPU-heavy rendering or production workloads, front intake may be worth considering.
Keep cables and panels out of the airflow channel
Modern cases offer rear cable-routing space for a reason. Thick bundles crossing the front of the motherboard can interrupt the air travelling towards your graphics card and CPU cooler. The effect is not always dramatic, but clean cable management makes a real difference in compact cases and makes future maintenance easier.
Route power cables behind the motherboard tray where possible, use the case tie points and avoid forcing side panels closed over bulky wiring. Keep spare modular PSU cables out of the system altogether. They are not needed, and they reduce the available space beneath the shroud.
Also check for less obvious obstructions. A sagging GPU power lead, a front radiator with tightly packed cables or a decorative panel with limited ventilation can all restrict airflow. Tempered-glass-heavy cases may look exceptional, but they need adequately vented front, side or bottom intakes to support high-performance hardware.
Set fan curves for noise as well as temperature
Running every fan at maximum speed is rarely the answer. It creates more noise, increases wear and can produce turbulent airflow without a meaningful temperature gain. A sensible fan curve allows the PC to stay quiet when browsing or working, then responds progressively as the CPU and GPU warm up.
Case fans should not rely on CPU temperature alone in a gaming PC. During many games, the graphics card generates the most heat, while the CPU remains comparatively cool. If your motherboard software allows it, tie front intake or bottom intake fan response to GPU temperature. If it does not, use a steady baseline speed that maintains airflow, then raise speeds gradually at higher CPU temperatures.
Avoid sudden jumps from quiet to loud. A gradual curve feels more refined and prevents fans constantly changing speed as temperatures fluctuate. After setting it, test a familiar game for at least 20 minutes and listen for unnecessary ramping.
Clean filters and heatsinks before buying upgrades
Dust is one of the most common causes of rising temperatures in an otherwise capable PC. Front and bottom filters should be checked regularly, especially if the system sits on carpet, shares a room with pets or is positioned near a radiator. A blocked intake filter can turn a carefully planned airflow setup into a restricted one.
Switch off the PC, unplug it and use compressed air or an electric air duster carefully to clear dust from filters, fan blades, radiator fins and heatsinks. Hold fan blades still while cleaning to avoid making them spin excessively. Do not use a household vacuum directly on components, as static electricity and accidental contact are unnecessary risks.
A clean PC does not need constant deep cleaning. For many systems, a quick filter check every month and a more thorough internal clean every few months is enough. The right interval depends on the room rather than the calendar.
Test changes instead of relying on appearance
The most attractive fan arrangement is not necessarily the coolest. Record idle and load temperatures before making a change, then compare the same game, benchmark or demanding application afterwards. Keep ambient room conditions as similar as possible, because a warm summer evening can affect results more than one additional fan.
Watch both CPU and GPU temperatures, fan noise and clock behaviour. If a change lowers temperatures by only one or two degrees but makes the system noticeably louder, it may not be worthwhile. Conversely, reducing dust intake and stabilising temperatures can be a meaningful improvement even if benchmark figures barely move.
If your PC still runs hot after sensible airflow adjustments, check cooler mounting pressure, thermal paste condition, radiator configuration and case compatibility. High-end components deserve a case and cooling layout tailored to their heat output, not a one-size-fits-all solution.
A well-cooled PC should feel considered rather than overworked: cool air enters where it is needed, heat leaves cleanly and fans only become audible when the workload demands it. That attention to detail is what turns a collection of premium parts into a dependable system built for the games and workloads you actually run.